This circuit is based on the switch mode LED current supply circuit that was posted here some time ago. This version was built to replace the incandescent lamp in my old soldering gun with a 1W LED (it's a huge difference... even with the LED running at 250 mA).

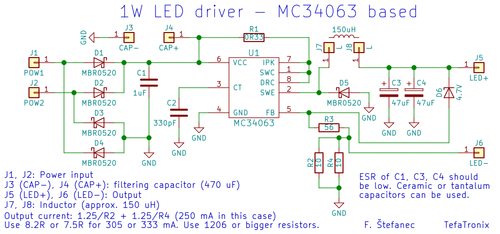
Schematic diagram (click for full resolution)
This circuit is based on the well-known and fairly old (but easily available) MC34063 integrated circuit. It operates in step-down (buck) mode. The bridge rectifier (D1-D4) allows the circuit to operate from an AC power supply (and can be omitted if a DC power supply is used). The output current is set by R2, R4 (two parallelled resistors), in this case (with 10 Ω resistors) it will be around 250 mA. When the voltage on the sense/feedback pin (5) approaches 1.25 volts, the IC reduces the duty cycle, leading to the reduction of output voltage and current. 1.25 V is a fairly high voltage drop causing the efficiency to be fairly low, but it doesn't matter very much for the planned use of this circuit. It will still be more efficient and provide better regulation than a resistor. The inductor (150 µH) is wound on a small yellow/white toroidal core (iron powder, relative permeability around 75) and packed in heat-shrink tubing, but any inductor capable of handling the frequency (xx kHz) and current (I recommend using an inductor rated for at least 0.7 to 1A) with a similar inductance should work. Capacitors C1, C3, C4 should be low ESR/ESL capacitors (ceramic/tantalum...). I used two tantalum capacitors (47 µF, 6.3 V) for output filtering. D6 and R3 prevent the output voltage from getting too high (leading to the destruction of C3 and C4).

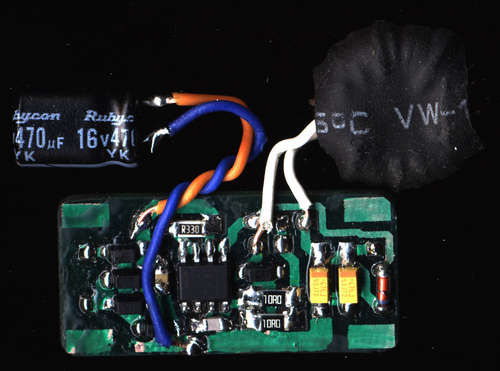
Circuit board (click for full resolution)

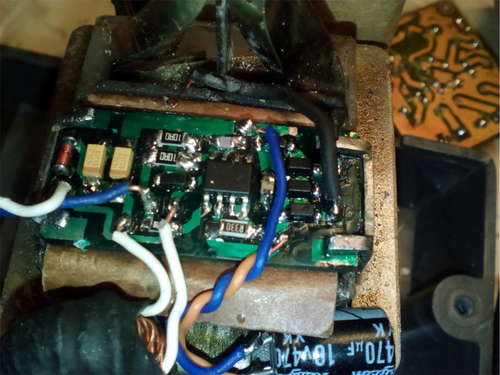
Board in place (click for full resolution)
This circuit seems to do the job in this case. Before putting it in place, I tested it using a regulated DC power supply, adjusting the voltage from 8 volts to 20 volts DC (for more than 15 volts DC/10 volts AC, use better diodes than MBR0520. In this case it will be powered from the auxiliary winding of the transformer inside the soldering gun, which is outputting somewhere around 7 volts ~). The current through the LED varied between approximately 249 and 256 mA while varying the voltage.
PCB design (KiCad) files and exported SVG files can be downloaded HERE.