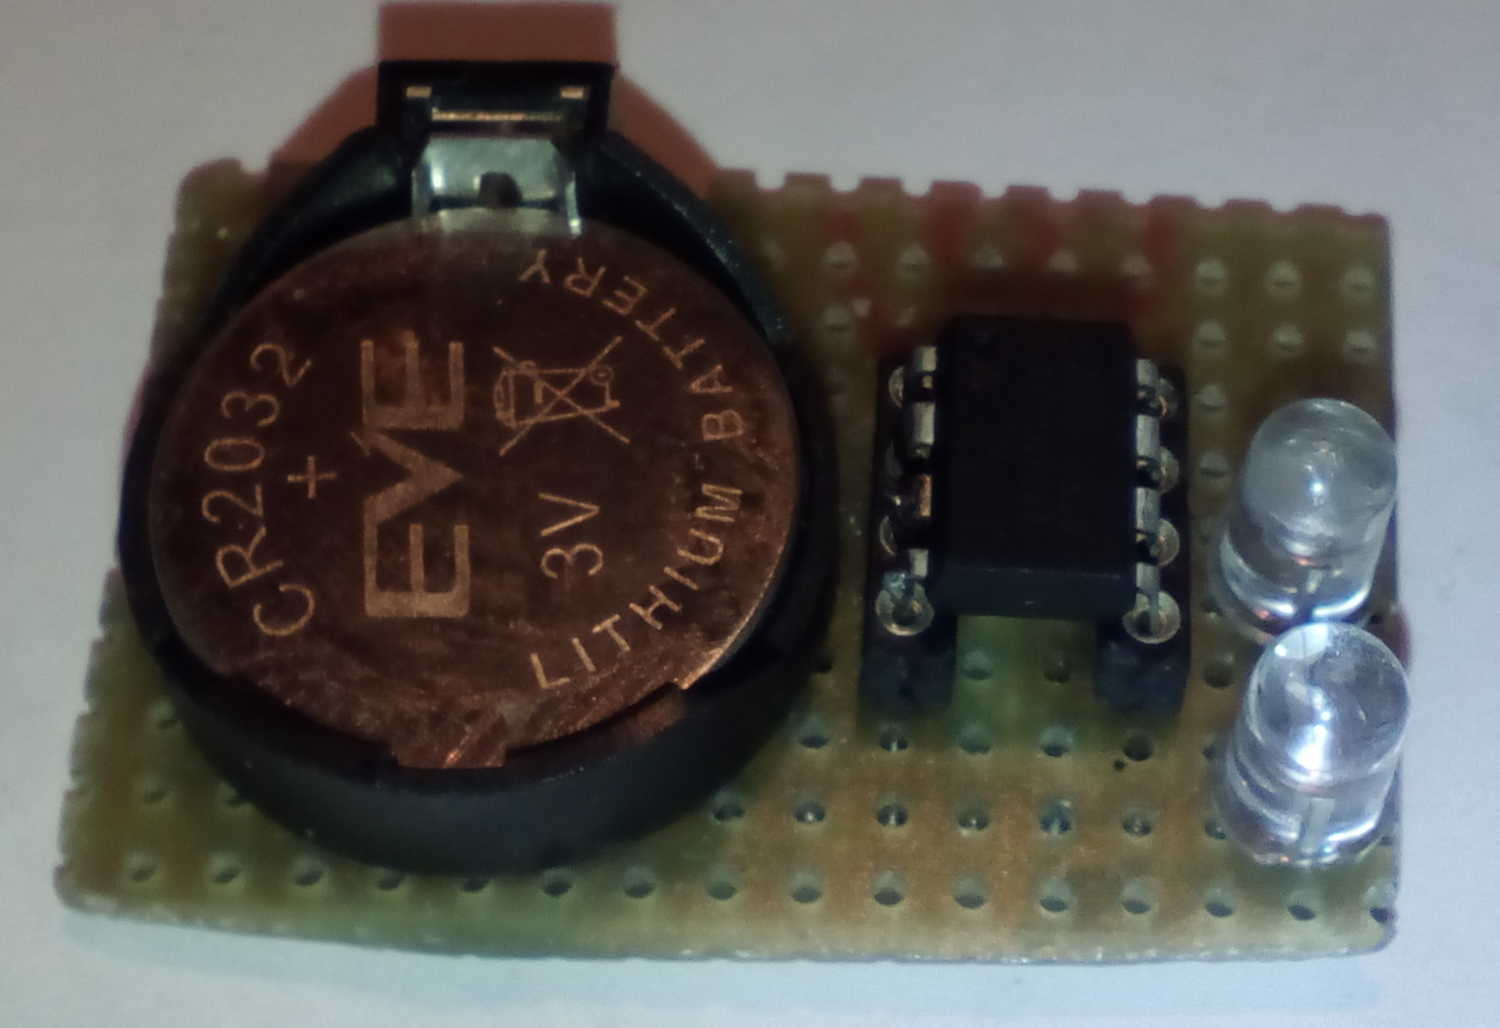
This was originally just a small test of sleep modes on AVR microcontrollers. The average power consumption (with the LED being on for 3ms each 4s) is somewhere around 15µA, therefore it can probably keep flashing for years on two AA batteries, or for over a year on a CR2032 button cell.
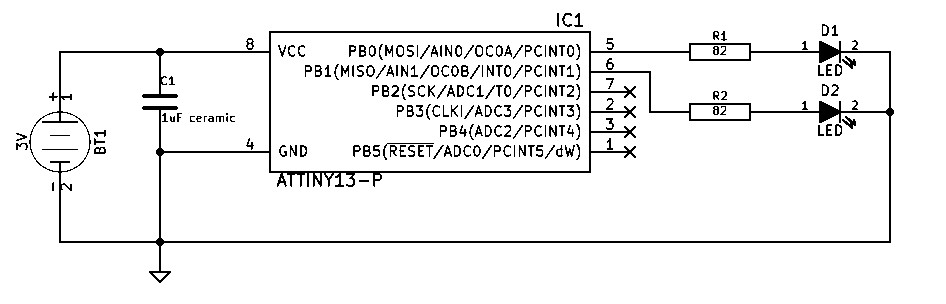
Schematic diagram (click for full resolution)
Note: if you want to use a single LED, remove R2 and D2 and use the single LED firmware from the download links.
This circuit is extremely simple. It contains just one capacitor, one ATtiny13 and either one or two resistors and LEDs. Using a microcontroller to make such a simple device is complete overkill, however, it's a simple way to get low power consumption.
The ATtiny13 (and most other AVR microcontrollers) contains a timer called the "watchdog timer", which can run independently from the CPU. It can reset the CPU, run an interrupt routine and wake the device from deep sleep. It has its own independent oscillator running at 128kHz. This device also supports several sleep modes. The deep sleep mode is used here - it shuts down all parts of the microcontroller, except output drivers and the watchdog, all other parts (CPU, timers...) get shut down. Only external (INT0 and PCINT) or watchdog interrupts can wake up the microcontroller from this sleep mode. While in sleep mode, the microcontroller consumes very little current, around 4µA with watchdog enabled.
The firmware is written in assembler and assembled with AVRA. The code is heavily commented and should be easy to understand. On power on, the microcontroller sets up the watchdog timer (4 second timeout, interrupt enabled), sets the corresponding pins as outputs, and goes into an infinite loop, that just sets the sleep mode and runs the SLEEP instruction over and over.
When the watchdog runs the corresponding interrupt, the interrupt routine disables sleep, turns on the LED, waits for 3ms, turns it off, reenables sleep and returns into the main loop. For the 2 LED version, it will also increment and mask an additional register that sets which LED will get turned on before turning on the corresponding LED (the LEDs flash alternately).
Fuses have to be set the following way: HFUSE=0xFF, LFUSE=0x7B (SPI programming enabled, brown-out detection disabled, 128kHz internal oscillator with 14 clock cycles + 64ms startup time).
The microcontroller consumes only approximately 4µA for most of the time. With any LED turned on (it's the same for the 2 LED and 1 LED versions), the current is roughly 12mA (given a forward voltage equal to 2V, and battery voltage equal to 3V) for around 3ms. It works only with red, yellow and some green LEDs due to the low voltage used here. There is also some additional time when the LEDs are off and the microcontroller is active and draws around 200µA, but this is practically negligible.
So, with 3 ms ON time with 12000 µA current draw and 3997 ms OFF time with 4 µA current draw, we can calculate the average current draw to be:
(4*3997+12000*3)/4000=12.997
lower than 15 microamperes. A CR2032 cell has 3 volts and a capacity of roughly 200 mAh, an alkaline AA battery has 1.5 volts (two batteries must be used) and roughly 2000 mAh. At 15 µA, the CR2032 cell could theoretically last for 13333 hours (=555 days), and the alkaline batteries could theoretically last over 5000 days, but they will likely leak first (there is also a 35 µA, 10 ms flash version available for download, which gives brighter flashes and can still last for years). In practice, the voltage decreases and the LEDs get dimmer.
For absolute beginners: The microcontroller has to be programmed before use. This device won't work with an unprogrammed microcontroller! When programming microcontrollers, be careful to get the fuse settings right, wrong settings will prevent the microcontroller from being reprogrammed.
In case you want to use AVRDUDE to program the microcontroller, you can use this command (given that the working directory contains the hex file (replace FILENAME with the right file name), a download link is at the end of this page):
avrdude -p t13 -c usbasp -B50 -U flash:w:FILENAME.hex -U hfuse:w:0xFF:m -U lfuse:w:0x5F:m